IRL Stencils
Your Mission is to create a stencil to paint a wooden board (artboard, sign, or coaster) or shirt/hoodie. Alternatively, you can create a stencil to etch a design on a glass.


Silhouettes
Before you start:
-
Decide and acquire what you will be using your stencil on
-
For example: a wooden board, a glass, a blank t-shirt, etc
-
-
Measure your surface. This will determine the size of your stencil. Write this down.
1. Find a silhouette to work with. I recommend one of the sites linked below. You may remix multiple silhouettes together (such as the Borderlands logo with the wreath of roses shown above).
-
If you use Google Images, you MUST set the search settings to Creative Commons licences! (click [Tools] under the search bar).
1B. Alternatively, draw your own silhouette on paper or directly in Photoshop.
-
After, bring your image into Illustrator and continue with step 2.
1C. OR you may use the Bing Image Creator AI like we did with the Remix assignment. Remember to keep a record of your prompts.
2. Open Illustrator, create a new file, and copy-paste (or drag the file of) your silhouette in.
-
Using the black arrow, select the silhouette.
-
Click the [Image Trace] button in the top bar.
-
For better results, you can have more control over this process by using the Image Trace panel: Window > Image Trace + expand the Advanced options.
-
-
Click the [Expand] button that is now in the top bar.
-
Click outside the image to deselect.
-
Clean up your image! Use the [Magic Wand] tool and select a white part of your image. Press Delete/Backspace to remove these paths.
3. Use the [Black Arrow] to select your image.
-
Click [Transform] in the top bar.
-
Change the W: (width) and H: (height) to fit inside the area you measured earlier (NOTE: make sure the units match! If you add "cm" or "in" after typing a number, it will size it accordingly.)
4. Save it and hand in your file. Wait for Ms. U to cut your stencil with Gertrude.
5. Once you have your stencil, you need to weed it. Get a weeding pick. It is VERY IMPORTANT that you remove the vinyl opposite of what is on your digital file.
For example, if your silhouette is a solid seashell, remove that and leave the outside border alone.
I repeat. Leave the outside border alone.
6. Once weeded, get some transfer tape and cover any areas that have holes. This will give your stencil more support when moving it from the packing to the surface. Try to avoid wrinkles.
What you do now will depend on what your stencil is going on.
First:
-
Transfer your stencil to your surface. Start on one edge or in a corner, and push your stencil down as you slide the backing out. Refer to the "Layering" videos on Gertrude's page for a visual of what I mean.
-
Once your stencil is applied, carefully remove the tape.
Wooden board?
-
Use diluted glue to seal the wood WITHIN your stencil. Ask Ms. U if it is not out already. Make sure to seal along the inner edges of the vinyl, this will help prevent paint from leaking underneath. Make sure you wash your brush well after!
-
After the glue has dried, you may paint your stencil. You may need to do a couple of coats. to cover the wood.
-
Remove the vinyl after.
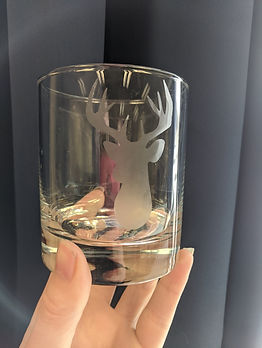
Glass?
-
Get Ms. U.
-
IMPORTANT: YOU MUST KEEP YOUR GLOVES ON AT ALL TIMES
Fabric?
-
For a cool tie-dye effect: use Sharpies to colour in your stencil. Leave white space between colours to give them room to spread.
-
Ask Ms. U to get out the rubbing alcohol.
-
Dip a straw into the bottle, then cover the top with your thumb. Hold over your stencil and remove your thumb to dribble. Watch the colours spread.
-
Remove vinyl after it has dried.
Trace your Silhouette
On What?
Size Accordingly